Layout: Think
Technique: Gesso Patterned paper
Ronda Palazzari
www.rondapalazzari.com
http://rondapalazzari.typepad.com
Supplies: Patterned Paper (DCWV), Cardstock (Bazzil), Watercolors (Sakura), Scissors (EK Success), Stencil (The Crafter’s Workshop), Baker’s Twine (Lawn Fawn), Pen (Sakura), Gesso (Golden), Adhesive (3M, Helmar), Black Ink (Ranger Ink), Other: Ruler, Paint Brush, Butterfly print, cosmetic sponge, palette
Technique Directions
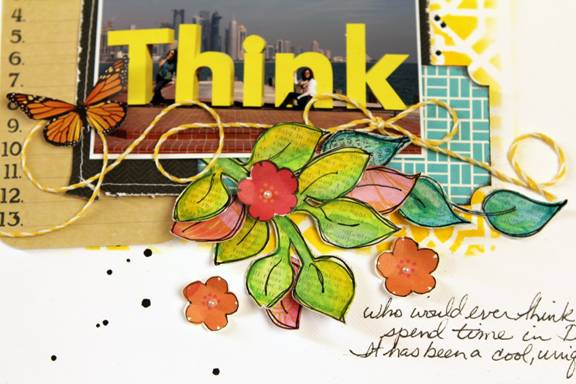
- Begin by watering down some gesso to create a wash. Paint this wash over the patterned paper and let it dry.
- Using a waterproof pen, doodle shapes onto your watercolor paper. You can also trace, stamp, or use a doodling template to create the shape.
- Paint in the shapes using watercolor and let it dry. You can also use spray inks, watered down acrylic paints, or translucent markers.
- Cut the shapes out of the patterned paper to use on any project, layouts, cards, or other craft projects.
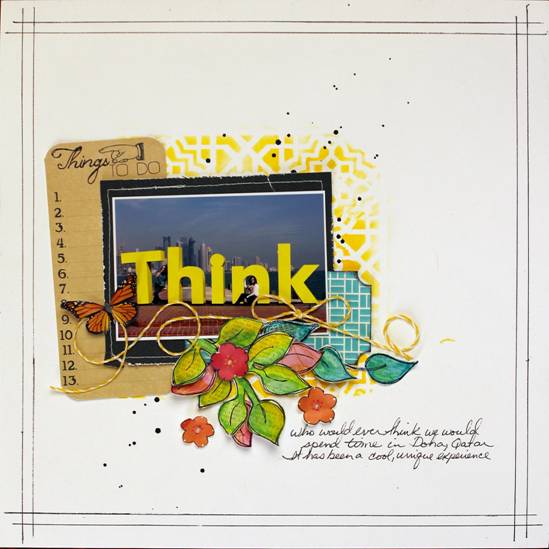
Layout Directions:
- Begin by sponging some watercolors through a stencil onto cardstock to create a dynamic background for your photos.
- To create a label shape out of patterned paper, trim down the patterned paper to a smaller rectangle. Use a small round punch on the corners removing a quarter of the circle to create the ticket like shape.
- Next layer trimmed down patterned paper pieces onto your background beginning with “things to do” patterned paper, then black patterned paper, and finally the blue patterned paper.
- Layer in the unique gesso patterned paper elements two-thirds down the page.
- Add your photograph to the patterned paper layers, letting some of the leaves layer on top of the photo.
- Cut out some flowers from some patterned paper to use as accents. Add pearls, rhinestones, or other bling to the center of the flowers to give it some dimension.
- Tie a bow in some baker’s twine and loop it around the photo and elements using a clear liquid glue to adhere it to the page. I added a printed butterfly on the twine for a pop of color.
- Draw some framing elements around the edge of the page using a black pen.
- Add your journaling to complete the page. My photo became my title of the layout but you could add in a title just above the journaling.
|