|
| 207-1 | Print | Close [X] |
| Julie McGuffee creates a wildlife photo frame on canvas. Watch the video for this project at: |
For More Information Visit: www.elmers.com www.xacto.com |
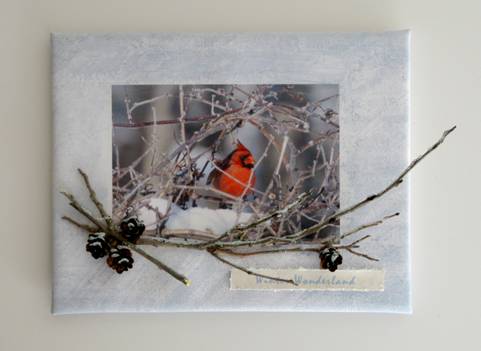
Photo Canvas By Julie McGuffee Add texture and interest to your photographs by printing on ink jet canvas.
For this project you will need: 1. Print photo of your choice onto ink jet canvas. 2. Use the paintbrush to spread an even coat of Glue All over the photograph then add random splotches/swipes of glue around the photograph. Let dry thoroughly. 3. Pour a puddle of paint onto wax paper, or disposable plate. Add water to thin the paint to a slightly watery consistency. Dip the paintbrush into water, dab off excess water onto a paper towel then use to apply a “wash” (watery coat) of paint across the canvas. Use a paper towel to wipe paint from the photograph. The glue will act as a resist and the paint will not adhere to areas where there is glue, resulting in a textured and mottled paint effect. Let dry. 4. Print a title onto parchment paper then trim to size. Pour a small puddle of Paper & Fabric glue onto wax paper. Slide the edges of the title through the glue then sprinkle with glitter. Set aside to dry. 5. Cut a 6 ½” x 9” and a 5 ½” x 8” piece of white foam board. Place the larger piece at the center of the back of the canvas. Wrap the edges of the canvas to the back of the foam board and attach with double sided tape. Tip: Trim the corners of the canvas for a neater look. Adhere the smaller piece of foam board to the back to cover the edges of the canvas. 6. Use embellishment glue to adhere the twigs and pine cones to the front of the canvas. Lay flat to dry then stand canvas upright. Add patches of glue to the tops of the twigs and pine cones, then sprinkle with glitter. 7. Glue the title in place with glue spots.
Happy Crafting!
|
Julie Fei-Fan Balzer & Julie McGuffee  |
|