Mini Journal
By Julie McGuffee |
Mini journals are an
easy way to keep a daily/monthly record of special events in your
life and it’s easy to create your own.
|
| Materials
Needed |
|
 |
Fiskars® Frame Templates –
Rectangles |
|
Fiskars® Ultimate ShapeXpress |
|
Fiskars® Self Healing Cutting Mat |
|
Fiskars® Euro Trimmer |
|
Fiskars® 1/16” Hole Hand Punch |
|
Fiskars® Eyelet Setter ¼” |
|
Fiskars® Embossing Stylus |
|
12” x 12” Med. Blue Cardstock
- DCWV |
|
Cardstock Scraps (Brown, Yellow, Robins
Egg Blue – DCWV |
|
8 ½” x 11” White
cardstock |
|
5 Silver Mini Brads |
|
Adhesive |
|
15” Ribbon |
|
Embellishments |
| |
|
| Note: When choosing papers
for your layout/project, look for colors and styles that complement
your photographs and theme. |
| |
| Instructions
|
| 1. |
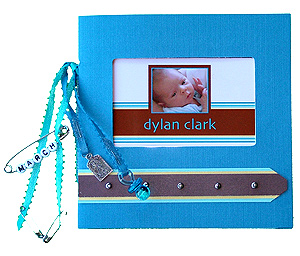
To make the cover, cut a 12” x 6” piece
of card stock. Score along the center then fold to create a 6”
x 6” cover. |
| 2. |
Use the shape cutter and rectangle template to create
a 2 ½” x 4” opening in the front. Set aside. |
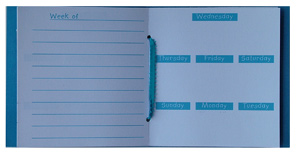
| 3. |
Pre print the inside pages by creating a template
on your computer, or you can leave blank if desired. Text and lines
will need to be printed out “landscape” orientation.
The finished pages will need to measure 6” x 11” and
the center will be at the 5 ½” point. I created lines,
½” apart on the left side of the center and days of
the week (calendar style) on the right side. Print two pages back
to back and one page on one side only. After printing, trim to measure
6” x 11”. Score each piece along the center. |
| 4. |
Stack these three inside sheets together then use
the eyelet setter to punch one hole on the center line about 1 ½”
from the top edge and a second hole 1 ½” from the bottom
edge. Center one of these pieces on top of the cover then use as
a guide to punch holes in the cover. |
| 5. |
Cut a 6” x ½” strip of brown cardstock;
a 6” x ¾” strip of yellow cardstock and a 1”
x 6” of Robins Egg blue cardstock. Starting 1” from
one end, use the hand punch to make 5 holes at 1” intervals
along the center of the brown cardstock. Insert a brad into each
hole then center and adhere this strip to the yellow strip then
these strips to the third strip. Trim one end as shown (if desired)
then adhere to the front cover of the journal with one end aligned
with the center fold. |
| 6. |
Stack the three inside pages together with the blank
side facing the inside cover. Attach to the cover by threading ribbon
through the holes and securing in a knot on the outside. |
| 7. |
Charms, alphabet beads and other embellishments may
be added to the ends of the ribbons as desired. |
| 8. |
Place a photo, or baby announcement card behind the
window then adhere to the first inside page. |
| |
|
| Sponsor:
Fiskars Brands, Inc. |