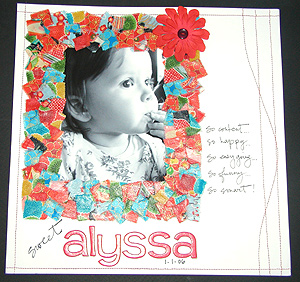
Take a square or rectangular piece of acid-free chipboard
and mark off the inside portion to create a photo frame. Using a
cutting mat and very sharp craft knife, cut out the inside edges
of the frame.
2.
Cut or tear up pieces of patterned paper—use
any size you want. Be sure to cut as many pieces as you think you
need to cover the chipboard frame.
3.
Pour out a small amount of decoupage glue into a plastic
or glass bowl. Working over a craft mat or piece of parchment paper,
brush decoupage glue onto the surface of the chipboard frame. Place
cut-up scraps of paper on the glue, covering the chipboard. Work
in sections, especially if your frame is large. Make sure the patterned
paper pieces extend to the outside and inside edges of the frame.
Allow the glue to dry.
4.
Apply another coat of decoupage glue on top of the
scrap covered frame. If you have pieces of chipboard showing, apply
additional pieces of paper to cover these spots. Let the glue dry
completely.
5.
To seal the frame and ensure that the paper pieces
are firmly attached, apply one more coat of decoupage glue. The
coat should be thin enough to avoid “pooling” (which
occurs when the glue collects between pieces of paper) but thick
enough to cover the entire frame with an even layer. Let dry overnight
before adhering to a scrapbook page or project.