Using the Fiskars Ultra Shape Express and Shape Cutter template, cut out two 4-inch circles from the orange cardstock. Cut one 4-inch circle from the green cardstock.
2.
Place one orange circle in the Fiskars Round Border Punch. Punch through the paper. Turn the circle to the right, line up the design with pre-printed border and punch again. Continue this until there is a punched design around the entire circle. Repeat this with the second 4-inch orange circle.
3.
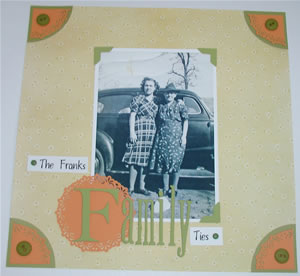
Gently fold the 4-inch green circle in half. Use the paper trimmer to cut the circle in half using the crease as your guide. Fold the two halves in half and cut those with the paper trimmer. Adhere the four quarters on the decorative paper – one in each corner. Repeat this process with one of the two punched orange circles. Adhere the orange punched quarter on top of the green quarters in each corner of the paper. Embellish with stitched or glued buttons.
4.
Paint the photo corners and the chipboard title letters green.
5.
Adhere the photo to the center of the decorative paper. Don’t forget to add the photo corners. Place the second punched orange circle in the lower left corner of the picture. Add your title. Use brads to attach the remaining words of your title.