Paper Bag Book with File Folders
By R. Lynn Baker |
| All the Things I
Learned in Kindergarten |
|
 |
| Materials
Needed |
 |
(3) Large paper grocery bags |
|
Standard sewing machine |
|
Double-sided tape |
|
Assorted papers (I used Seasons Printed
Papers by Paperbilities; School Ruled Paper by Making Memories;
and Shades of Blue by Karen Foster Designs, but any appropriately
themed papers can be used.) |
|
Assorted letter stickers (I used Alphabets
Sticker Flip Pack by Remember When and Varsity Letter Foam Stickers
by Fibre-Craft.) |
|
Foam letter stamps |
|
Primary colored acrylic paint (I used Scrapbook Colors
Kit, Childhood by Making Memories.) |
|
Ribbon cut to 8 ¼” in length (I used
Rainbow Stripe ribbon by Offray.) |
|
Glue Dots |
|
Tape measurer (I used a tape measurer cardstock sticker
by Flair Designs, but a real tape measurer may also be attached
using Glue Dots.) |
|
Letter-size file folders |
|
Label maker with multi-colored tape (Dymo) |
|
Assorted envelopes |
|
Assorted ribbons |
|
Work samples, artwork, report cards, certificates
and photos (I took photos of my son actually creating some of the
work and art samples that I included in his Paper Bag Book, and
included then on the pages with the samples.) |
| |
|
| Instructions |
| 1. |
Choose how many pages you would like your book
to be-- you can figure out how |
| 2. |
many bags you will need using the following simple
equation: number of bags x 4 sides – 2 covers = number of
pages. So, in this example, I used 3 bags to create 10 pages. (3
bags x 4 sides = 12 – 2 covers = 10 pages.) |
| 3. |
Stack bags by alternating the direction of the gusset
on the bottom of each bag. (Lay your first bag flat with the gusset
up and to the left; second bag with the gusset down and to the right;
third bag with gusset up and to the left.) |
| 4. |
Carefully bind bags together using a straight stitch
from a sewing machine down the center of the stacked bags. (Another
option for binding these books together is with the use of ribbon.
Simply punch holes down the left side of the bags using a ¼”
circle hand punch by Fiskars, and bind with ribbon tied into slip
knots.) |
| 5. |
Fold bags together down the stitched center to create
a book. |
| 6. |
Cut colored paper to fit the back cover of the book.
Using double-sided tape, cover the back of the book with the colored
paper, wrapping the paper around the spine of the book to cover
the stitching on the spine. |
| 7. |
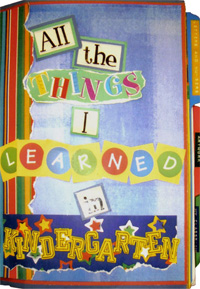
Decorate the cover of the book with chosen papers
and stickers. (I incorporated techniques such as paper tearing,
double matting and layering to add dimension.) |
| 8. |
Open the bag book to the first page, and lift the
gusset of the bag-- this will become a pocket for work samples.
Cut colored paper to fit under the gusset to create a nice colored
background for your pocket. Adhere paper under the gusset using
double-sided tape. Adhere the top and bottom sides of the gusset
to create a pocket. |
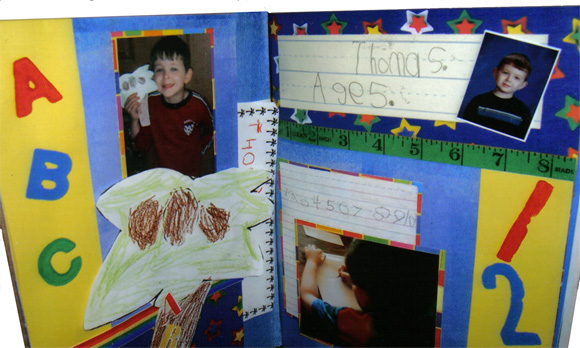
| 9. |
Cut paper to fit the page created by the top of the
gusset. Decorate page using papers, stickers, work samples, letter
stamps and paints, and photos. Adhere ribbon using Glue Dots to
divide your page into sections. |
| 10. |
Decorate the opposite page to match. |
| 11. |
Continue decorating each pocket and page in the same
fashion to complete your book. Use assorted envelopes to hold work
and art samples on each page as needed. Adhere envelopes straight
to the decorated page using double-sided tape. |
| 12. |
Create dividers using colored file folders. Cut file
folders down to fit inside the pockets created by the open ends
of each bag. (I cut the backside of each file folder off and used
it to slide into each open bag.) Label each file folder using the
label maker and tape to create specific sections of your book. |
| 13. |
Slide art work, certificates, work samples and other
important papers into each open ended bag. |
| 14. |
You have now created a wonderful keepsake full of
fun memories and accomplishments that your child can cherish for
years to come! (Note: Most grocery bags are not acid-free. If acid
is of concern, bags can be pre-treated using an acid-neutralizing
spray.) |
 |