Close this window to return to series
600 project listing |
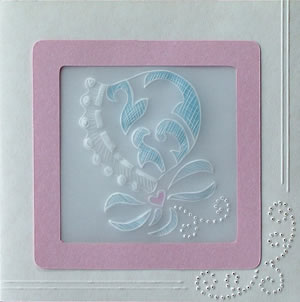
Parchamoré Card
By Julie McGuffee |
| Materials
Needed |
 |
| |
 |
Fiskars® Parchamoré Starter
Kit |
| |
 |
Fiskars® Parchamoré Baby
Bonnet Stencil |
| |
|
Fiskars® Mini Shape Boss |
| |
|
Fiskars® Large Frame Templates -
Squares |
| |
|
Fiskars® Squares Template |
| |
|
Fiskars® Shape Cutter |
| |
|
Fiskars® Self Healing Cutting Mat |
| |
|
Fiskars® 12” Euro Trimmer |
| |
|
Colored Pencils |
| |
|
12” x 12” Cardstock –
Ivory Parchment |
| |
|
Pale Pink Pearl or Blue Diamond Dust
Cardstock |
| |
|
Adhesive |
| |
| Instructions |
| |
1. |
Cut the parchment cardstock in half. Score a
line down the center of one piece then fold to create a 6”
x 6” card. |
| |
2. |
Cut a 4” square from the center of the front
of the card.
|
| |
3. |
Make either two pink, or two blue frames as follows:
Cut a 3 ½” square from cardstock. Use the 4 ½”
square to cut around the opening to create the frame. Set aside.
|
| |
4. |
Following the instructions in the Parchamoré
starter kit, emboss and pierce two baby bonnets. Each design will
face in opposite directions. NOTE: The design will need to fit
into the 3 ½” opening of the frame, so you will not
need to emboss the entire ribbon. Color the areas as desired.
|
| |
5. |
Using the Parchamoré piercing stencil (#3
of 3) for the design, pierce a design in the bottom, right corner
of the front of the card. Using the cutting channel in the paper
trimmer as a guide, dry emboss two lines, 1/8” apart ¼”
from the edge along the bottom and outside edges of the front
of the card. |
| |
Referring to photograph, assemble the
card as follows:
With the “right” sides facing outward, align the Parchamoré
bonnets back to back. Hold in place with tape (temporarily). Adhere
one frame over each side, with the edges of the frames aligned.
Trim the Parchamoré even with the edges of the frame.
Adhere one framed design over the opening on the front of the card,
and then adhere the second at the back of the opening. |
| |
|
|
| Sponsor:
Fiskars |
|