Close this window to return to series
500 project listing
Life’s
Adventures by Lynn Krucke
Materials
Needed
12 x 12 cardstock-rosebud, bahama,
raspberry, lemonade, limeade (Bazzill Basics)
8.5 x 11 lightweight vellum
Premo! polymer clay- pearl (Polyform
Products)
Craft chalks (Craf-T Products)
Sculpey flexible push mold- Let It Bloom
(Polyform Products)
Spritz bottle with water
Sculpey Super Slicer (Polyform Products)
Oven thermometer
Border punch-flowers (Fiskars)
(Optional) 1 inch square punch (Emaginations)
Paper trimmer (Fiskars)
Non-stick scissors (Fiskars)
Glue tape and dispenser (3M)
Glue Dots- craft (Glue Dots International)
Foam tape (3M)
Photographs
Instructions
Making
the clay embellishments:
1.
1. Condition polymer clay before beginning by kneading
and rolling each color on your hands until the clay is soft and
pliable.
2.
2. Spritz the push mold lightly with water. Press
clay into the mold. Trim excess clay if necessary.
3.
3. To insure clean, neat edges for the molded clay-
use the pad of your finger to “push” the clay away from
the edges of the mold all the way around before flexing the mold
and removing the embellishment.
4.
4. Color the clay pieces with chalks as desired.
5.
5. Bake the clay pieces at 275 F for thirty minutes.
Allow to cool.
Assembling
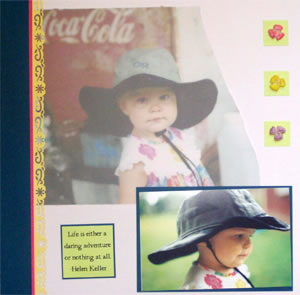
the page:
1.
Enlarge one photo to 8.5 x 11 inches and copy or print
it onto vellum. Tear one of the short sides.
2.
Cut 12 inch strips of yellow, raspberry, and blue
cardstock.
3.
Use the border punch to create a decorative edge
along one side of the yellow strip.
4.
Layer the strips over the edges of the vellum and
adhere to the page as shown.
5.
Cut or punch one-inch squares from green cardstock
and adhere near right edge of page. Add clay flower to each square.
6.
Mat second photo and quote on coordinating cardstock
and adhere to page as shown.