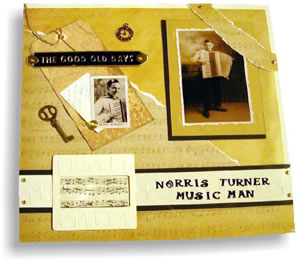
Cut 1/2" off the top and one side of the vellum
sheet. Adhere to the Off White background sheet aligning with the
bottom left corner. Tear the music sheet diagonally from top left
to bottom right then adhere on top of the vellum.
2.
Cut around the photograph with the deckle scissors.
Mat with tan cardstock. Emboss the corners of the tan paper with
the frame design using the Scrapboss and stencil. Mat with black
as shown.
3.
Emboss a 12" x 1.5" strip of Off White
cardstock with music notes. Mat with black. Use rubber stamps
and Stayz On ink to stamp a title on a 1.5" wide strip of
acetate. Place over matted strip then attach to the page with
brads, aligning with right edge as shown. Note: It is easier to
attach with brads if holes are punched first with the hand punch.
Attach opposite end of embossed strip.
4.
Create the slide mount by cutting a small rectangle
from a piece of off white cardstock with the Shape Cutter and
template. Cut a square around the rectangle. Cut two. Emboss music
notes along top and bottom edges. Adhere together with double
sided tape, sandwiching a transparency of music notes in the window
area. Adhere to the top of the embossed strip.
5.
Tear a narrow strip of the music paper to attach
across the upper right corner. Attach with brads. Referring to photograph
add additional embellishments as shown.