Close this window to return to series
300 project listing
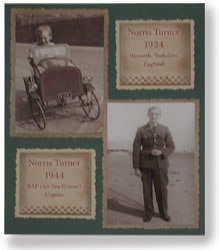
"Norris
Turner - 1924/1944" by Julie McGuffee
Give a vintage look to
new scrapbook pages with heritage colored chalks!
Materials
Needed
Craf-T Products Chalks and Applicators
– Heritage colors
Fiskars Paper Trimmer
Fiskars Paper Edgers – Deckle
Fiskars Border Punch - Diamonds
Fiskars Photo Memories Country cardstock
– Green & Cream
Xyron 510 and Re-positionable Adhesive
Remember to choose colors of paper and embellishments
that complement your photographs. Colors chosen here reflect the
colors and theme of my photographs, but may not be the best color
choices for yours.
Instructions
1.
Cut two 3” title squares from cream cardstock.
Cut cream mats about half an inch wider and longer than the photographs
and the title squares. Trim the edges with the deckle scissors.`
2.
Color the edges of the mats for the photographs with
a combination of gray and brown chalk. Place the photographs on
the mats with adhesive.
3.
Use the border punch to punch a diamond design on
a scrap piece of paper. Place over the bottom of the title square
then chalk over the design. This will work like a stencil to create
a chalked diamond design. Chalk around the top and sides of the
title squares (after they have been printed) in the same manner
as the mats for the photos.
4.
Attach the title squares to the cream colored mats.
Referring to photograph, arrange then attach the photos and titles
to the page.
Tip:
Use chalk to add a hint of color to the photographs.
Since these were a one-of-kind vintage photographs, I made copies
on the Kodak Picture Maker to use on my scrapbook page.