Close this window to return to series
200 project listing
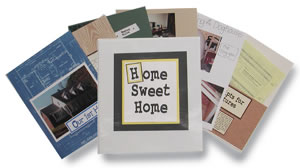
Home
Improvement by Beth Madland
Materials
Needed
8 ½” x 11” album/notebook
Page protectors
Cardstock – brown, cream
Pattern paper with a home improvement
theme
Adhesive
Plenty of before and after photos of
home improvement projects
I made a home improvement album showcasing the projects
my husband and I have done around the house. I choose an 8 ½”
x 11” format so I could easily make copies and pass on the
projects and the information to the next homeowner. I kept information
about each project: receipts, paint chips, store location, etc.
so I could easily replicate the project or the next homeowner could.
One technique I did throughout this project was pocket
pages. Pocket pages are great for storing receipts, pictures, and
cards.
Instructions
1.
Cut a brown piece of 8 ½” x 11”
cardstock in half. Set aside one half of the paper.
2.
Use adhesive around three sides of the paper leaving
one side (the width of 8 ½” x 11”) free. Use
adhesive that comes in strips.
3.
Place the brown paper on one sheet of cream 8 ½”
x 11” cardstock. Make sure the adhesive is on the bottom and
the sides of the brown paper and that there’s an opening at
the top. This serves as our pocket. Use eyelets, brads or even a
needle and thread to sew the pockets shut.