Acrylic, chipboard and felt albums are fun to create for special occasions. This album is a mix of all three surfaces, each one requiring a different adhesive to “make things stick”.
Supplies:
Elmer’s® Craftbond™ Tacky Glue
Elmer’s® Craftbond™ Fabric and Paper Glue
Elmer’s® Craftbond™ Dot Stamper
Elmer’s® Craftbond™ Spray Adhesive
Elmer’s® Craftbond™ Ultra Stix All Clear
Elmer’s® Craftbond™ Extra Strength Glue stick
X-ACTO® Knife
X-ACTO® Razor Trimmer
Painters® Extra Fine and Calligraphy Silver markers
Multi Media Album from Fancy Pants
Embellishments – Buttons, Silk flowers & leaves, Paper lace, ribbon, chipboard letters,
metal charms, etc.
Foam Brush
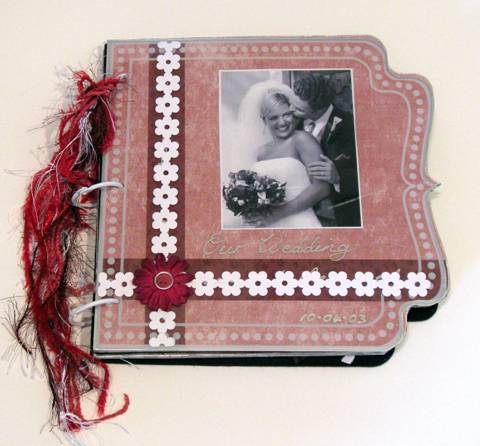
1. Album Cover – Acrylic: Adhere paper lace with spray adhesive. Silk flower and button were glued in place with tacky glue. Write title with marker.
2. Page 2 – Chipboard: Color the edge of the chipboard with calligraphy marker. Spread fabric & paper glue generously over the surface of the chipboard. Aligning the corner of the chipboard with the corner of the paper, press paper firmly in place. Smooth with soft cloth or paper towel. Let dry then trim excess paper from sides with X-Acto knife. Repeat process for opposite side. Glue photos in place with dot stamper and paper embellishments in place with the glue stick. Journal on dark paper with silver marker.
 2 2
3. Page 3 - Chipboard: This page is the back of page 2. Same steps apply plus, the calligraphy marker was used to add the silver border around the edge of the page and the fabric leaves and silk flower were adhered with tacky glue.
3 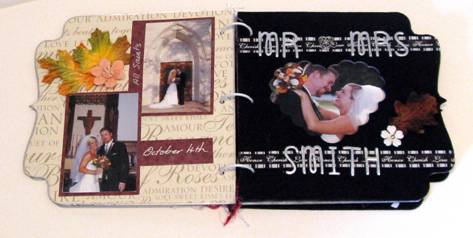 4 4
4. Page 4 – Felt: The felt page was adhered to a chipboard page with a generous coating of the fabric & paper glue which was applied to the chipboard.. The heart was cut from the center of the page with a die cutting machine. Glue strips of ribbon in place with fabric glue. Color the chipboard letters (also cut with a die cutting machine and alphabet dies) with the calligraphy marker then glue to the ribbon with fabric glue. The silver charm was adhered with ultra stix and the leaf and flowers with fabric glue.
5 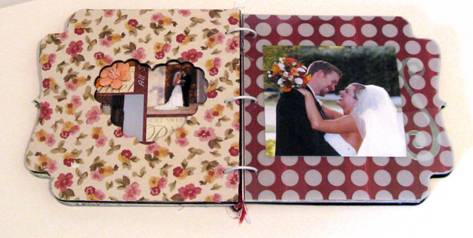 6 6
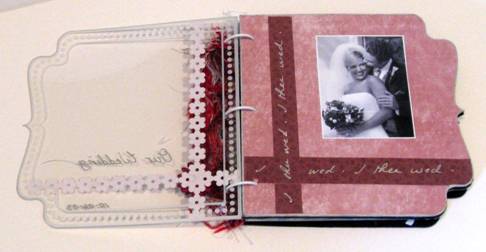
5. Pages 6 and 7 – Acrylic: The photo on page 6 was adhered with spray adhesive. The paper photo mat on page 7 was cut the same size as the photo on page 6 then adhered on page 7 behind the photo on page 6. The photo was glued in place with dots. A decorative metal buckle was added to a length of ribbon and adhered to the paper mat with ultra Stix. The ribbon was trimmed to size and the ends glued in place with a dot of fabric glue.
7 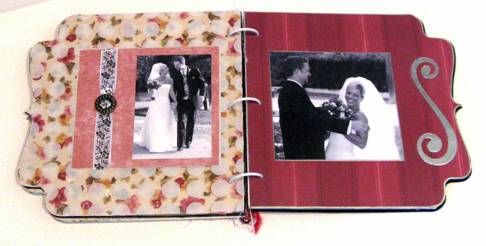 8 8
6. Page 8 – Chipboard: See instructions for page 2. The decorative accent is an acrylic shape painted on the back with the silver marker then adhered with spray adhesive. The photo was edged with the silver calligraphy marker and the buttons glued in place with tacky glue.
7. Page 9 & 10 – Felt: The photograph and the fabric embellishments were glued in place with fabric glue. The rhinestone was glued to the button and the button to the flower with tacky glue.
9 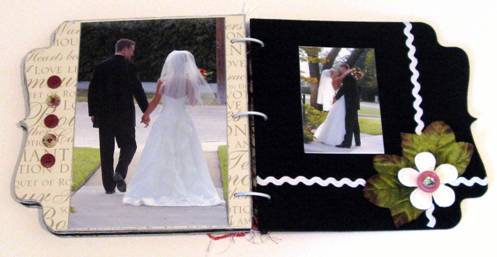 10 10
8. Assemble pages with rings provided. Add lengths of assorted fibres to rings to finish.
|