|
|
|
|
|
|
|
|
| |
|
|
|
| |
 |
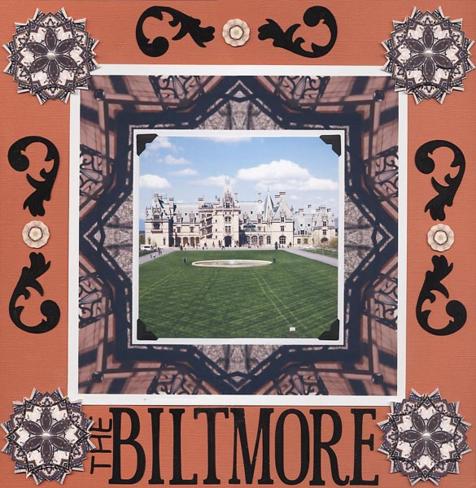
Kaleidoscope Collections -- Custom Embellishments
By: Holly Craft
Sponsor: Kaleidoscope Collections
|
|
Materials Needed: |
•Kaleidoscope Collections: Kaleidoscope Kreator™ 2.0 or 3
•Kaleidoscope Collections: Frame Frenzy Template Pack
•Digital or scanned photo(s)
•PC with inkjet printer
•Glossy photo paper
•Black velvet paper
•12” x 12” cardstock to match photos
•Spellbinders: Symbology, Julius Alpha (retired) dies
•Black photo corners
•5mm pearl rhinestones
•Four ¾” buttons
•Permanent (flat) adhesive
•Foam adhesive
|
Instructions: |
Kaleidoscope Frame:
- Open digital photo in Kaleidoscope Kreator (File>Open Image). Click on the wedge button in the toolbar to choose the FF Square 60 (16) template shape. Move the photo around in the workspace to create a kaleidoscope frame to your liking.
- File>Print Kaleidoscope. Enter 8” in the inches field and check Center Kaleidoscope on Page. Uncheck all of the other boxes and then click OK.
- In the printer dialog that appears next, choose your printer and set it for glossy photo paper. Make sure glossy photo paper is in your printer. Click OK to print. Trim leaving ¼” of white around the outside of the frame. (Do not cut out center of frame.)
Kaleidoscope Medallion Embellishments:
- Back in Kaleidoscope Kreator, open a second image (File>Open Image) – or use the same image if you want. Click on the wedge button in the toolbar to choose the Northern Star (12) template shape. Move the photo around in the workspace to create a kaleidoscope design to your liking.
- File>Custom Print Options>Print Multiple. Enter 2.5” in the inches field and 12 in the next field, then click Add. Uncheck all of the other boxes and then click OK.
- In the printer dialog that appears next, choose your printer and set it for glossy photo paper. Make sure glossy photo paper is in your printer. Click OK to print.
- Cut out four of the kaleidoscopes as normal. For the next four kaleidoscopes, choose a line in the pattern that is inside the kaleidoscope and cut along that. Do the same (slightly smaller) for the last four kaleidoscopes.
- Put the kaleidoscope medallion together using foam adhesive, smallest on top and largest on bottom.
- Add a pearl rhinestone in the center of each.
Assemble scrapbook page:
- Adhere kaleidoscope frame in center of page.
- Use photo corners to attach 6” square photo in center of frame.
- Apply kaleidoscope medallions in each corner using foam adhesive.
- Adhere buttons in the center of each side.
- Die cut eight scrolls and title from black velvet paper.
- Adhere scrolls and title as shown.
|
Guest: |
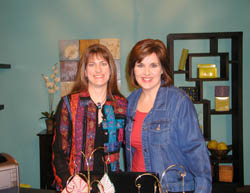 Jeanie Sumrall-Ajero and Beth Madland
|
|
|
|
|
|
 |
|
|
 |
|
Copyright © 2009 Scrapbook Memories, All Rights Reserved |
|
 |
|
 |
|
|