Happy Holidays Layout
Design by Erin Clarkson
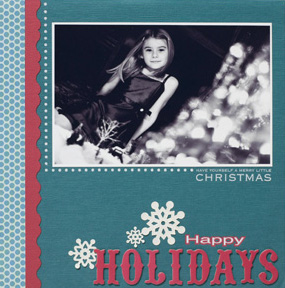
- Add a 3/4x12" piece of patterned paper to the left side of a 9x9" piece of cardstock.
- Trim the edge of a 1/2x9" piece of cardstock with decorative-edge scissors. Attach it next to the piece of patterned paper.
- Adhere a 6 1/2x4 ¼" photo as shown. Apply rub-ons around the photo and as part of the title.
- Apply stickers and chipboard letters to complete the look.
“Party” Card
Design by Erin Clarkson
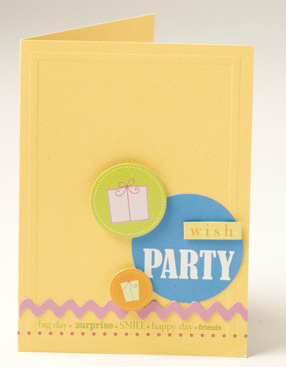
On a 5 1/2x4 card base rub-ons and stickers as shown. use adhesive foam to make some of your circle stickers pop out.
“Party” card with Flower
Design by Erin Clarkson
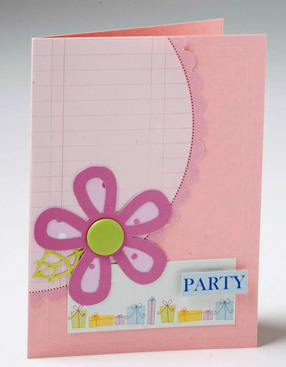
- On a 5½x4” card base, add half a scalloped 6” circle to the left edge, with 1½” of the circle hanging off the top of the card. Trim off the excess.
- Add stickers, including a flower sticker adorned with a brad in the center. Attach a word sticker with adhesive foam.
“Gifts” and “Smile’ cards
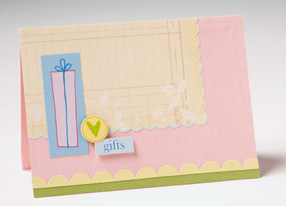 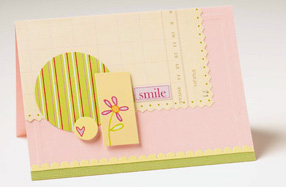
- Attach a 4½x 2½” piece of decorative-edge patterned paper to the upper left corner of a 4x5 ½” card base. Add stickers as shown, using adhesive foam to attach some of the stickers.
- Adhere a 5½x1/4” strip of cardstock to the bottom of the card, and position a scallop-edge border sticker above it.
|