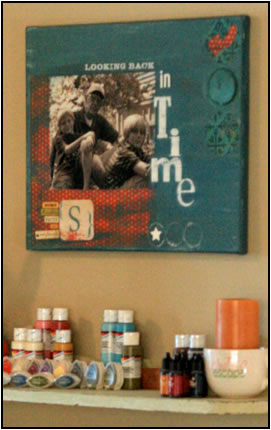
1. Using a foam or chip brush, paint the canvas all over the front and sides. Paint will take nearly an hour or so to dry completely.
2. Run your large cardstock piece and your 8x10 photo through the Xyron 9” Creative Station. Adhere patterned paper to canvas. Set aside photo.
3. Using some of your left over paint, lightly and randomly drag paint around the edges of your cardstock to blend it into the background.
4. Adhere photo where desired.
5. Apply ‘Looking Back’ Rub on just above photo.
6. Cut the word ‘TIME’, arrow and circles using the Xyron Wishblade and your preferred font.
dhere to canvas.
7. Run die cuts through 5” Creative Station and apply to canvas.
8. Let dry and when finished, use a small foam brush to apply a bit of Modge Podge under any edges that might have popped up a bit due to movement while creating. |