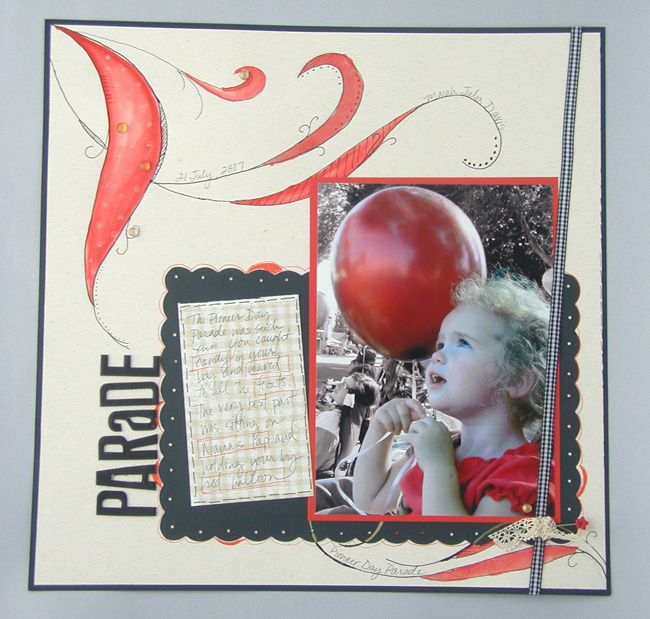
Parade Layout
Instructions:
- Pencil Doodling
- Free hand doodle in upper right and upper left corners using large curves and swoops.
- Note: For simplicity, my “pencil” doodles were printed on the computer
- Go over doodling with a Micron 08 black marker.
- Any size or a variety of sizes with work. Rather than trying to trace exactly, use “mess ups” to create curves and spaces.
- Lines can be thickened to cover any mistakes
- It may help to rotate the paper as you trace. I find it easiest to pull the marker toward me.
- Painting with Watercolors
- Outline spaces with darker watercolor, then fill in with more watery color.
- Scallops and Mat
- Cut 6x9” piece of black cardstock with cloud scallop decorative scissors
- Use small hole punch to create interest in each scallop.
- Trim ¼” off two sides of doodled cardstock. Mount onto black cardstock.
- Add scalloped mat in bottom right corner.
- Accents and Journaling
- Use Sakura Star Dust Gelly Roll (clear) to accent inside painted swooshes using stripes, cross-hatching and dots
- Use Sakura Gold Gelly Roll to doodle on black mat if desired.
- Use Sakura Micron 05 black pen to create faux stitches around journaling block
- Use Sakura Micron 02 black pen to write journaling and the Sakura Micron red pen to outline words in journaling.
- Use Sakura Micron red pen to outline scalloped black paper.
- Use Sakura Micron black pen to add date, name and additional cross-hatching and striping to painted portions.
- Add journaling and photo mat – adhere with adhesive.
- Finishing Touches – photo, title, accents and dew drops
- Attach “dew drops” randomly using glue dots.
- Place “Parade” chipboard letters along the side of scalloped mat.
- Add photo.
- Add black gingham ribbon vertically on right side.
- Tie lace in a knot around gingham ribbon near the bottom of the right corner of photo.
Place red pin inside the lace knot. |