Sticker Techniques
Designs by Erin Terrell
Presented by Melissa Inman
For more information visit: 
|
Giving stickers an epoxy look
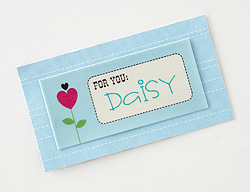
“For You Daisy” gift tag
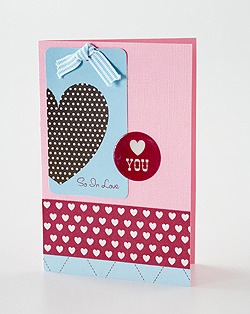
“Love You” card
|
|
| |
Materials Needed |
 |
Paper and stickers by
SEI. |
|
Triple-Thick Clear Glaze by Krylon. |
| |
|
Instructions |
| 1. |
Place your sticker on a piece of waxed
paper to protect your surface as you work with the spray glaze.
The sticker will also be easy to remove from the waxed paper so
you can secure it to the rest of your project once the glaze is
dry. |
| 2. |
Shake the spray glaze well. Always work
in a well-ventilated area any time you use aerosol sprays. Spray
the sticker with a thin coat of the spray glaze and let it dry. |
| 3. |
Once the first coat is dry, add another
layer, repeating the process until you’re happy with the thickness. |
| |
|
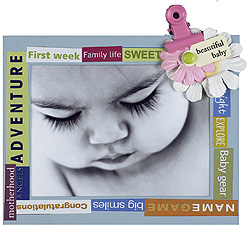
| Beautiful Baby frame |
|
| |
| Materials Needed |
|
Stickers, frame, paper flowers, tag, brads by Making
Memories. |
| |
|
| Instructions |
| 1. |
Apply the word stickers to a pre-finished metal frame. |
| 2. |
Add a photo to the frame opening. |
| 3. |
Finish with a colorful clip and paper flowers |
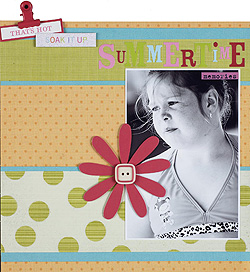
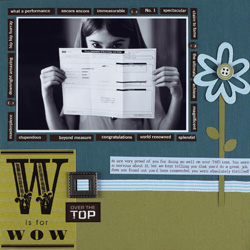
| W is for Wow page |
|
| |
| Materials Needed |
|
Cardstock, ribbon, buckle, chipboard flower, brads by Making Memories. |
|
Stickers by 7Gypsies |
| |
| Instructions |
| 1. |
Start with long word-print border stickers. Cut individual words
and phrases out of the strips, choosing words that support your
page theme. |
| 2. |
Add the strips around the focal-point photo on your layout. |
| 3. |
Use a pushpin, paper piercer, or small hole punch to make holes
for brads in the large spaces between the words. We used brads that
matched the color of the word strips to make them a subtle accent. |
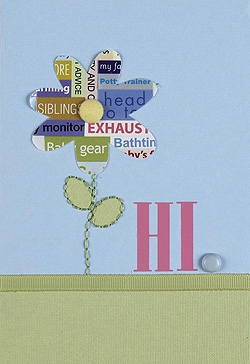
| “Hi” card |
|
| |
| Materials Needed |
|
Stickers, rub-ons, brads by Making Memories. |
|
Cardstock by Bazzill Basics Paper |
| |
| Instructions |
| 1. |
Working with a sheet of word stickers left over from the baby
frame project, cut a flower shape from the sticker sheet. Freehand
draw one on the back of the sticker sheet or use a template to make
the shape. We used the negative space from the chipboard flower
used on the “W is for Wow” page. |
| 2. |
Use scissors or a craft knife to cut the shape from the sticker
sheet. Be sure to cut through the stickers AND the backing. |
| 3. |
Leave the stickers attached to the backing and add a bit of adhesive
to the back of the entire piece to attach it to your project. If
you peel the stickers off, they word cluster will fall apart and
piecing it back together can be difficult! |
Melissa Inman
| Sponsor: Scrapbooks etc. Magazine |
|