Epson Computer
Tip – Finding Photos in the Funniest Places
(Using Photos in Accessories)
By Barbara Kotsos
 For
project ideas and more, visit www.epsoncreativezone.com For
project ideas and more, visit www.epsoncreativezone.com
|
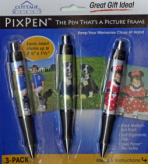
| Bigger
isn’t always better. Some of our most precious images are
now found proudly displayed in pens, handbags, key chains and
one of the most popular accessories – photo jewelry. Reducing
and cropping your images to fit in tiny spaces is easy with the
help of your computer and/or scanner. |
| 1. |
Open PSE 5.0, click on
Edit & Enhance Photos |
| 2. |
Once the Editor Screen is open, locate
and open the image(s) with which to work when creating your photo
jewelry or accessories.
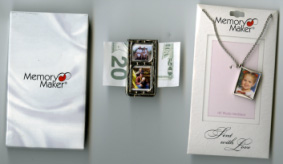
a. For this sample, we’ll work with the Memory Makers Photo
Jewelry Money Clip and need two images. This is a great gift for
the men in your life!
|
| 3. |
Many times, the photo jewelry and accessories
come with very simple instructions for resizing your images for
easy insertion. However, if your particular piece did not, or perhaps
it was misplaced, let’s look at how to determine measurements. |
| 4. |
Pop out the plastic cover and the sample
image in the piece. Keep track of the plastic pieces, since they
are clear – they are easy to misplace. Using a ruler marked
in both inches and centimeters, measure the width and height of
the sample images. Depending on the size, sometimes it is easier
to work with centimeters versus inches.
a. For this sample, there are two images to measure. The vertical
image measures 0.60” x 0.76” and the smaller horizontal
image measures 0.65” x 0.55”.
|
| 5. |
Examine the images and determine which
image is best suited for each size and orientation. Your eye will
immediately size up the best choice and crop. |
| 6. |
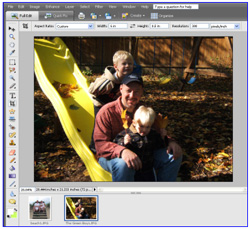
Select the Crop Tool (shortcut: press
C) and change the Aspect Ratio to No Restriction and input the first
set of measurements, along with a DPI of 300 pixels/inch.

a. If you are working with centimeters, make sure you change the
unit of measurements.
|
| 7. |
Using your Crop Tool (shortcut: press
C), drag a marquee in the perfect proportions over the image. Click
on the Check Mark to confirm the cropping action.
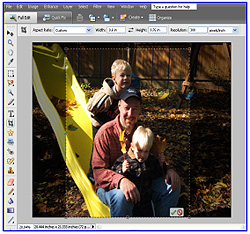
a. Here’s a tip. If your measurements are off slightly, don’t
worry. When cropping your photos, allow a bit of “wiggle room.”
This will allow you to trim slightly smaller, if necessary.
|
| 8. |
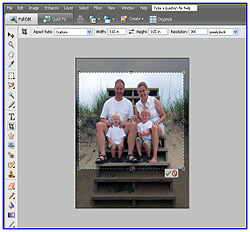
Repeat the cropping action for the
second image, using the second set of measurements. Click on the
Check Mark to confirm the cropping action.
|
| 9. |
For easy printing, open a New Blank
File sized to the following specifications:
a. Size: 4”x6”
b. DPI: 300
c. Background: White
|
| 10. |
Switch to the Move Tool (shortcut:
press V) and drag and drop each newly cropped image to the new blank
file.
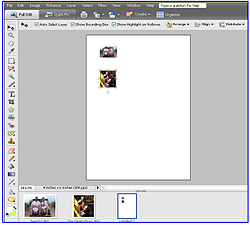
a. If you are creating multiple pieces of jewelry or accessories,
don’t waste the paper.
b. Edit all the images necessary for all the pieces and drag and
drop as many that will fit on the sheet of paper. Don’t forget,
you could easily use 5”x7”, 8”x10” or letter-sized
photo papers which are highly water-resistant.
|
| 11. |
Print, trim and insert your photos.
Don’t forget to replace the plastic protective covers. |
| |
Barbara Kotsos
| Sponsor: Epson
America, Inc. |
|