Match Book
Mini Album
By Nancy Martinez
|
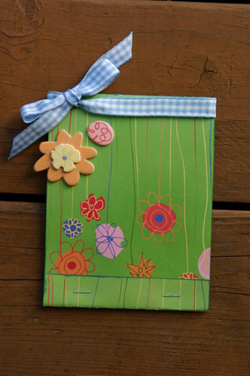
| “Double-sided papers
are essential for creating this simple, whimsical matchbook. This
grandmother’s/mother’s day brag book features 4 wallet-sized
photos & handwritten sentiments.” |
|
| Materials
Needed |
 |
1 - 12x12 Betsey's Blossoms
(both sides)- Cloud Nine Designs |
|
1 - 12x12 Blue Sky by Day (both sides)
– Cloud Nine Designs |
|
Dee's Cottage Chipboard: "Cottage
Flowers" – Cloud Nine Designs |
|
Dee's Tabs – Cloud Nine Designs
|
|
Dee's Journaling strips – Cloud
Nine Designs |
|
Blue Gingham Ribbon |
|
White cardstock for photo mats (optional
- print photos with a white border) |
|
Rain Dots –Cloud Nine Designs
|
|
Chipboard Shapes- Cloud Nine Designs
|
|
Little Big Words –Cloud Nine Designs
|
|
Fabric Tape |
|
Pencil |
|
Some type of folding tool? (ie. bone-folder,
stylus, etc.) |
|
Black marker |
|
Fiskars® Euro Trimmer |
|
Scissors |
|
Fiskars® Tape Runner |
|
Craft mat |
|
Stapler |
| |
|
|
| Instructions
|
| STEP 1: Trim & Fold Matchbook
“Cover” |
| a. |
Trim a 12” x 4.5” strip of double-sided
“Betsey’s Blossoms” cardstock. The printed side
is the outside cover, while the plain green side serves as the inside
cover. |
| b. |
Mark 2 fold lines on the “inside” of the
cover strip. With a pencil, mark at 5-1/4” from the paper’s
edge with printed flowers, and 7/8” from the edge without
printed flowers. The narrow 7/8” fold will be a pocket for
holding “pages.” |
| c. |
Fold on lines. |
STEP 2:
Cut Matchbook “Pages” |
| a. |
Trim 2 strips of 12” x 4-1/4” double-sided
“Blue Sky by Day” cardstock. |
| b. |
Cut the 4-1/4” wide strips into 3 graduating
measurements:
4-1/4”w x 4”h
4-1/4”w x 4-5/8”h (flip)
4-1/4”w x 5-1/4”h
|
| c. |
Once the 3 pages have been cut, flip the middle strip
OVER to show off the darker blue side of the cardstock. |
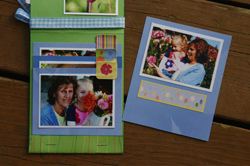
STEP 3:
Embellish your “Pages.” Adhere photos, sticker tabs
& journal stickers. |
| a. |
Adhere a wallet-sized photo to each “page.”
(Optional - mat photos with white cardstock first.) |
| b. |
Apply one sticker TAB to each of the 3 pages. |
| c. |
Handwritten sentiments should be added now - it will
be difficult to add them once pages are “bound” with
staples. Tip: Write on the self-adhesive journal strips before lifting
them off the sticker sheet. |
STEP 4:
Assemble & Adhere “Pages” together. |
| a. |
Assemble pages in a graduating order, with the smallest
page in front & the tallest in back. Remember, the middle one
is flipped over to reveal a different shade of blue. |
| b. |
Before slipping the pages into the matchbook, give
them some added security with adhesive. Spread them out in front
of you, and apply adhesive to the BASE of the middle & back
pages. It’s not necessary to apply adhesive to the front page.
Reassemble pages and apply pressure to the base where adhesive was
applied. (This will keep your pages from slipping around when stapling
the book together.) |
STEP 5:
Staple Pages into the cover “Pocket.” |
| a. |
Open the pre-folded cover strip. Slip all 3 pages
into the 7/8” crease. The pages fit snugly into the “pocket”
and are flush with the fold. |
| b. |
Your book will be bound with staples. If desired,
measure & mark the staple points before using the stapler. |
| c. |
With the cover open, and the pages facing you, staple
each end of the narrow “pocket” going through all 5
layers of paper. |
STEP 6:
Embellish the “Cover” (front, inside & back) |
| a. |
Front cover - Adhere & layer chipboard flowers
to the front. |
| b. |
Inside cover - Adhere an additional photo, a journaling
strip, and a chipboard flower. |
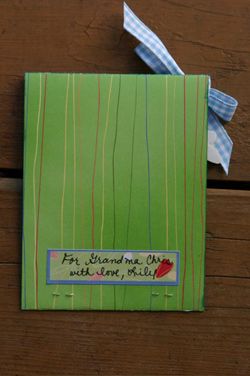
| c. |
Back cover - Write a handwritten sentiment on a journal
sticker then apply. |
| d. |
Tie a ribbon around the top fold. |
| |
|
| Sponsor:
Cloud Nine Designs/ Fiskars® Brands Inc. |