|  Some
wonderful effects can be achieved by layering photos and
background papers then using a brush to create an artistic
effect. Although the results are stunning, the steps are
fairly simple and straightforward! Some
wonderful effects can be achieved by layering photos and
background papers then using a brush to create an artistic
effect. Although the results are stunning, the steps are
fairly simple and straightforward!
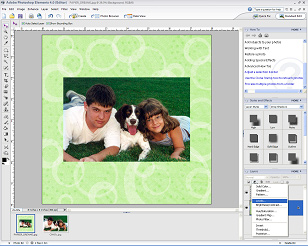
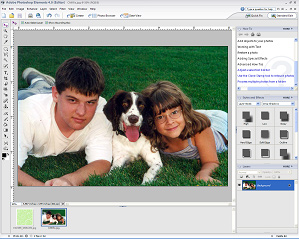
Step 1: Open Photoshop Elements and then
open 2 files, either photos or background papers, by going
to File | Open and browsing your system
for the proper files. Here we’ve opened a photo and
a background paper.
Step 2: With one file open in your workspace
(the photo), and your Move Tool selected,
drag your photo on top of the background paper in the photo
bin. You now have one file with two separate layers.
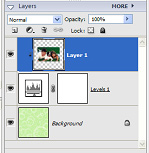
Step 3: Click on the background layer
in the layers palette to highlight it,
then create an adjustment layer by clicking on the adjustment
layer icon. You can choose any type of adjustment
layer – here we’ve chosen Levels.
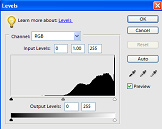
Once the levels box opens, just click OK
without making any adjustments.
 Step
4: Click on the top layer to highlight it, the
click CTRL + G to group the top layer to
the adjustment layer. Step
4: Click on the top layer to highlight it, the
click CTRL + G to group the top layer to
the adjustment layer.
Step 5: Click on the adjustment layer
to highlight it. Switch to your brush tool and select an
artistic brush. Make sure that your foreground color is
set to black (you can reset it by clicking on the black/white
boxes).
Step 6: While you still have your adjustment
layer highlighted and an artistic brush selected, click
on the photo with your brush to “remove” a portion
of the top layer (photo) so the bottom layer (background
paper) shows through!
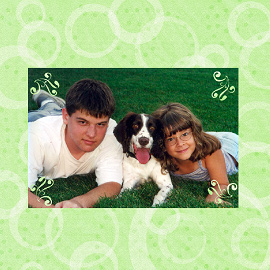
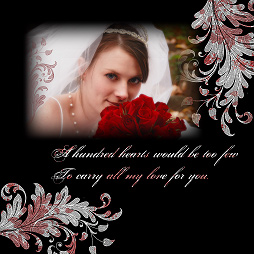
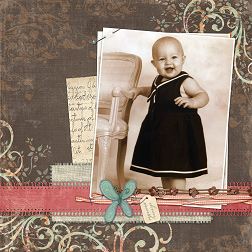
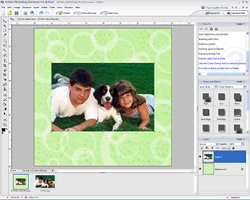
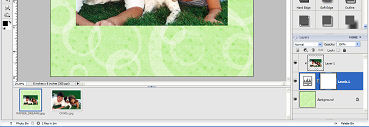
Here are two more samples of what you can achieve with this
technique!
|